
Reproduction File Size Matters For Print, Web
by John Siebenthaler
Update: Adobe imaging and drawing applications contain a simple way to export web res 72dpi images using the File>Save For Web & Devices… command. If a web image is all you need, this is the route to go. You can easily reset the final dimensions in the "save for…" dialogue box. What about print? Export to PDF using Acrobat, and choose the best profile, the profile provided by your printer, or create your own. Acrobat solves the resolution problem on the fly.
It’s All About The Final File Size – Not DPI!
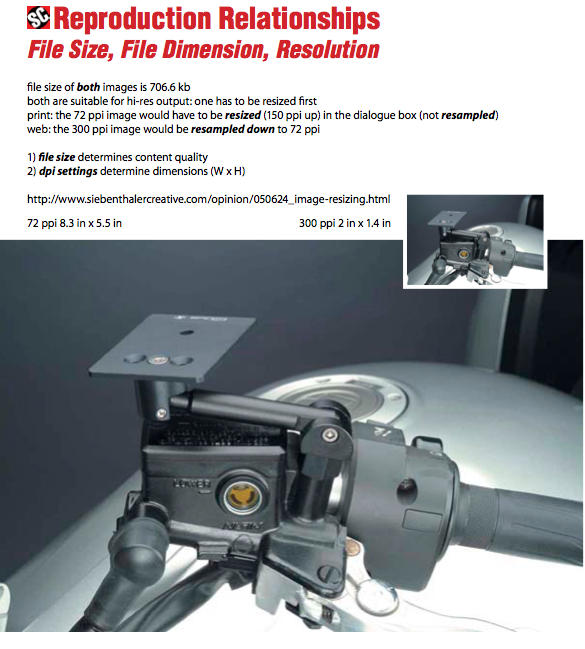 This PDF demonstrates why file size (kb, mb, or gb) is more important than resolution (dpi) when sizing raster art.
Whether intended for web or print, in every instance both the final use (web, print, etc.) and the size of the reproduction must be considered before optimizing the photo or other raster art for it’s ultimate destination as a high or low resolution image.
Think of it this way. Your raster image—JPG, PNG, TIFF—is a bucket of water. It can fill a bunch of little bottles, or one big bottle. But before it can do either it has to hold a certain amount of water. How much water it holds (i.e., file size) determines how many bottles of any size – low or high res, small or large print space – it can fill. Resolution only matters for appearance.
In this column I’ll run down the basic must have knowledge for a successful digital print experience, and how you can set up a more efficient workflow for sizing finished art for reproduction. (Read why pro photographers are essential for more product photo background.)
DTP: Publishing’s Wild West
(Skip this section and head to the last paragraph if you just want to get down to cases.) To understand how we got to where we are today, let’s go back a few decades, when print publishing had yet to evolve from analog (engraving) to digital (scanning), the forerunner to what’s refered to now as desktop publishing.
The engraver’s craft of halftoning was the reproduction of continuous tone artwork (usually a photograph) with only a few solid colors—CMYK for color, black ink only for grayscale, representing the color on paper as an ink density.
When we ask “how big”, we’re technically referring to image file size as measured in bytes, but we’re thinking image reproduction dimensions of width and height, normally in inches (print) or pixels (web).
Look at an original analog (i.e. from a negative via an enlarger) photograph, and it’s impossible to determine eyeball where one shade of gray (using a black and white photo as a reference) leaves off and another begins. To give you an idea of how sophisticated computers have become, today’s digital software fixes that number of discrete shades in a photograph at 256 levels in a JPG file, 255 in software.
A halftone renders those tonal and color densities as an ink-carrying dots per inch screen, with 133-dots per inch (dpi) pretty much the practical standard for newsprint, and somewhat higher for premium paper stock printed on an offset press. Digital repro uses inkjets, but the principle remains the same.
Simply put, without a halftone screen to interpret shading you’d need 256 shades of ink on press, ranging from dense black to nearly white, just to reproduce a black and white image with every level present. That would also require 256 plates to carry the ink, 256 ink fountains to be filled, and on and on. You get the picture.
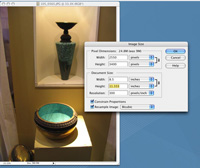
clik for larger view
The critically important file size dialogue box opt-comd-I. Reproduction size, screen settings, and total file size are all determined in this area.
Resampling up or down resets the file size either for the repro size or the screen resolution. Altering either causes the file size to decrease or increase depending on the dimensions or screen selected.
Changing the resolution (ex: 300ppi to 150ppi) without resampling leaves the pixel (onscreen) dimensions and file size unchanged, while the reproduction size (inches, pixels, centimeters, etc.) will double (approximately).
This is why when it comes to reproduction you have to keep an eye on the repro dimensions to avoid disappointment.
The original JPEG shown opened as a nine meg file, which supports an 8.5 x 11 reproduction size when the screen is set to 180 DPI.
But bumping that same screen size to 300 DPI while resampling, as demonstrated in the example, results in a file two and a half times as large.
If resample is selected, the new size can only be achieved by interpolating, or upsampling, the original image.
In The Beginning
The need to reproduce the medium of photography meant that a method of screening – produced by using a screen (a linear measurement derived from the first metal engravings) – the original art was needed.
Halftones solved the problem by basically saying light areas of a print would get fewer, tiny dots and dark areas of a photo would get more, bigger dots. The dots in question carry the ink, so more dots equals more coverage, fewer dots less coverage (all assuming a basic white paper as the medium.)
Practically, this means a lot of ink in the shadows and not very much in the highlights. And this is how " dots per inch," or DPI, measurement came into being.
Halftoning originally required the photo to be rephotographed through a glass filter etched with varying line screens onto lithography film, which was then used to burn a metal plate that then went on press. Hence the now discarded description Lines Per Inch, i.e. 133-line and so on.
Today we scan the art if necessary, then burn either to film, send direct to plate, or skip the intermediate steps entirely (inkjet) for print.
Regardless of how the file is produced, the result is still referred to as a halftone, and in practice it allows one color of ink (black) to be deposited onto the paper in larger or smaller amounts, thus presenting the effect of darker or lighter shades of black.
It’s the same process for color as it is for black and white, times four. The appearance of color is represented by blending three color plates or jets—(C)yan, (M)agenta, and (Y)ellow, plus (K)black.
Extremes involve screen sizes of up to 600 dots per inch on waterless presses for really detailed printing, but whether it’s an ad in the classifieds, a billboard over center field, or your favorite centerspread, the process is basically the same. (I’m not going into stochastic printing, a weirdly different and hugely intricate method for wringing every last drop of detail out of an image.)
All in all the digital medium is fantastic, but unless the basics are understood it can produce downright weird results.
What’s All This Fuss About Image Resizing?
In today’s digital environment, pixels per inch, dots per inch, and lines per inch are all used more or less interchangeably, to everyone’s continuing confusion. The short explanation is that scanners (hardware) and Photoshop, InDesign, Illustrator, etc. (software) have removed the middleman engravers and film houses of previous years, and replaced somewhat specific craft and skill with varying degrees of generalized expertise and knowledge.
 The heart of the problem, from where I sit, is
the blind insistence by occasional publication and print production managers on an arbitrary
and capricious measurement that has nothing to do with actual, sized reproduction as laid out using software.
Traditionally, the higher the line count (55, 85, 133) the greater the detail. But since art is now produced digitally instead of on film or art board, there’s another critical piece of the puzzle that needs to be understood for DPI to have any meaning. And that’s file content.
In the way old days, content was measured by film format or print size — thirty-five millimeter, roll film, four by five or larger sheet film, 4x5, 8x10 photo, and/or paste-up art on a layout board (logos, illustrations, etc.).
Photo artwork was usually submitted as an 8x10 (standard) or larger photo enlargement (unless the photo was reproduced by direct 1:1 contact) from a negative or positive (transparency), regardless of the original format. Bigger was (almost) always bigger, and nothing’s changed in that regard.
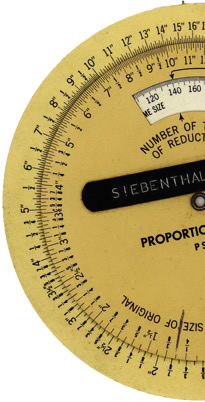
Cropping and halftone enlargement or reduction (expressed as percentages using a proportion wheel that calculated dimensions by selecting the size of the original and then rotating to find the desired final size) was a very messy, inexact business by digital’s precise standards.
My Megs Against Your DPI
Today, rasterized (as opposed to limitless size independent vector) artwork, whether an original image direct from a digital camera, phone, or GoPro, or a file produced by flatbed, scanner, or lab drum, is measured in kilo, mega, or gigabytes instead of film size.
What’s this got to do with you? Well, in practical terms, the usual minimum file size for an average letter sized (8 1/2 in x 11 in) portrait illustration is in the general vicinity of 20 MB. A quarter page (approximately 4 in x 5 in) raster (bitmap) image should be around 5 MB. Only then can we decide on the DPI part of the equation, and for each of these it’ll be around 200 DPI.
You say you want a 300 DPI full page raster ad? Than you’d better have an original file size that can support it. The reason is, the higher the screen (content) count, the larger the file has to be to support it. That 20 meg file is plenty for letter size art at 175 DPI, but falls way short if you insist on the same dimension but at 300 DPI output—there’s usually not enough data to fill the dimensions at that reproduction rate.
In other words, I’ll always take the 20mb, 72dpi file over the 5mb, 300dpi version to give me the content I need for reproduction.
DPI – It’s Not The Measurement You Think It Is
 At this point, I
need to mention the variables that also enter into the equation. Photo
subject matter has an enormous amount to do with file size and perceived sharpness and clarity.
A picture of a blue sky with just a few puffy clouds doesn’t require anywhere near the number of pixels a food shot for the cover of Gourmet magazine does. For the sky shot, you’d get virtually the same quality of reproduction at, say, 55 DPI as you would at 300 DPI.
The main reason is the huge difference in contrast between the object color boundaries, and the math required to interpolate the colors, but this is a discussion best left for another day.
In the early days, which ran from the late ’80s to the mid-’90s, a lot of folks used a weird math formula that when applied rendered a goofy one hundred something point something something DPI for a screen setting.
It was against the backdrop of then really expensive storage, difficult delivery involving actual hard drives and attached cabling, and really slow processing (RIPing)—forget e-mailing, because the internet was in it’s infancy then—that JPEG standards began to evolve, all because people had to think really hard about absolute file sizes more than screen settings.
So what do we know? Reproduction (DPI) settings determine the resolution an image is reproduced at, and how high that can be set depends on the image’s file size expressed in bytes. We can play with the DPI by adjusting it lower or higher, which usually (but not always) affects the amount of detail reproduced, but we can really only reduce, not enlarge the actual file size without affecting quality.
Trying to increase the file size to match the resolution through upsampling (interpolation) can work, but is very much dependent on the subject matter of the image. If fidelity is critical, it’s best left as an emergency option only.
I Really Didn’t Need To See Any Of This
Bottom line, your major responsibility is to understand a) the final size (width and height) the image will be reproduced at, and b) making sure the file size will support the DPI setting, which can vary widely from 50dpi or less for outdoor to 72dpi web res to 300dpi and higher for print, that will be applied.
Remember, when we say how big, we’re technically referring to image file size as measured in bytes, but we’re thinking image reproduction dimensions of width and height, normally expressed in inches (print) or pixels (web).
Practically, most of what we see in print can be accurately reproduced at 200 DPI. The reasons are mostly technical, but for the most part the original scene content isn’t that demanding, the paper stock may be less than premium, the original isn’t that good, the shooting conditions are perhaps less than ideal, the photographer may or may not have a professional background, and frankly the reproduction size doesn’t warrant the (potential) detail.
In fact, it can be stated that reproducing less than perfect art at higher than necessary screen settings can actually degrade an image. Here’s a handy PDF that quickly demonstrates the relationship between DPI/ppi and file size.
- Here’s what’s never mentioned. All the absolute insistence on a 300 DPI setting totally falls apart if the art’s to be printed in very large format. Thinking about that centerfold? An 11 x 17, 200 DPI, RGB file is a tidy 22 meg. Bump it up to 300 DPI, and you’ve got a 48 meg file – before conversion to CMYK, which as you might expect further increases the bloat factor.
- It gets worse if you’re thinking about, say, posters. A 40 x 48 poster at 300 DPI weighs in at a hefty 495 meg, before CMYK conversion. Which is why we image billboards at around 50-55 DPI, or the world would collapse under the weight of all those ones and zeroes.
- In short, if you don’t have the original file size in megabytes, you’re probably better off at a lower DPI.
In a perfect world, all publications would specify file size requirements in terms of bytes, not screen settings, which as we’ve seen physically affect only the reproduction dimensions, and determine the final DPI only after the repro size has been set. Instead of saying all art must be 300 DPI, your half-page ad would instead require a minimum file size of 10 MB, optionally with resolution set at 300 DPI.


